Retain the original steering wheel controls when replacing the factory radio. by an aftermarket radio.
Depending on the vehicle's equipment and the functionality and software of the aftermarket built-in device certain control functions may be missing or due to other functions be replaced.
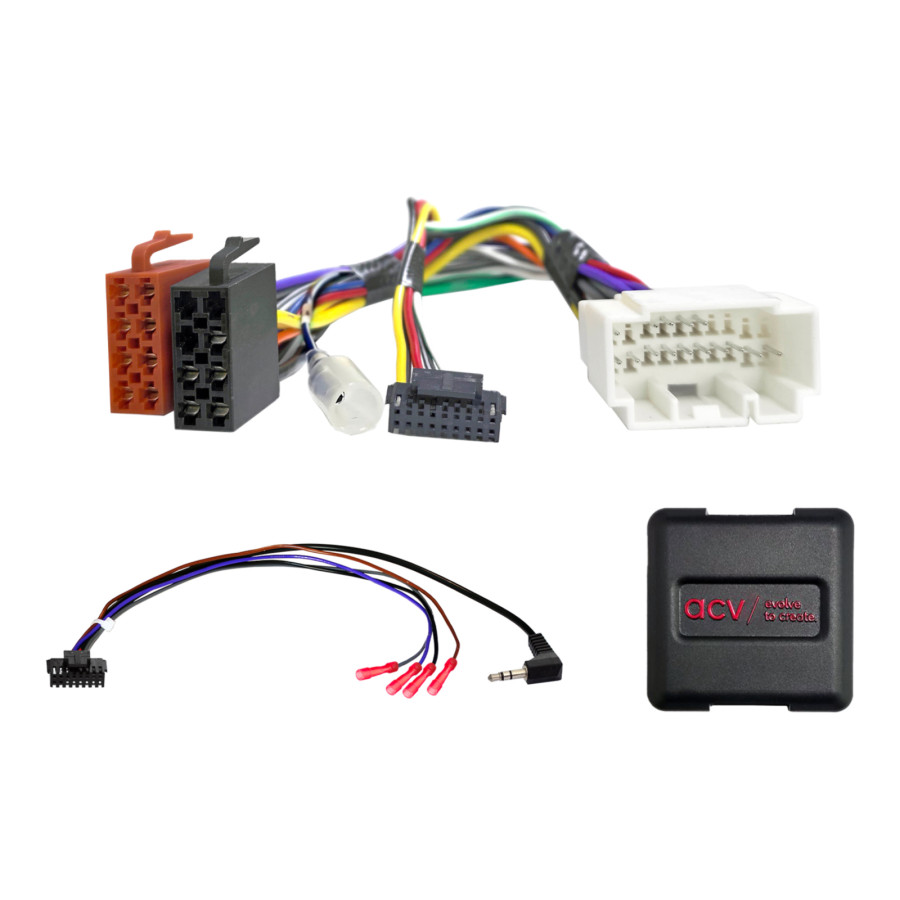
Compare the adapter plugs shown in the image with those in your car and check if they visually and fit technically.
Also check whether one of the mentioned original factory radios was installed in your car.
Before final assembly, check whether the vehicle functions, vehicle settings and Steering wheel controls work properly.
Remark:
Analog
connector: 20-pin Honda blue connector: OEM SWC > 3.5 mm connection / loose wire vehicles with Alpine OEM car radio vehicles with 5 SWC functions*
DIP switch settings for the manufacturer of the retrofit device (consult the manual)
Re-imported vehicles or vehicles with different software may differ in terms of functions be incompatible.
SWC
*vehicles with 3 SWC functions > article: 42k-1131-002
General installation instructions:
Control: 1: Check all control functions and vehicle settings of the OEM HU. 2: Disconnect the OEM HU while de-energizing. 3: Check all interface connections for correctness, de-energized.
Connection and connection sequence: 1: Check the settings and hardware configuration of the interface, with the power off. 2: Check the configuration of the HU connection cable, with the power off. 3: Connect the HU connection cable according to the user manual of the retrofit HU. 4: Connect all other connections according to the user manual of the HU retrofit. 5: Connect the entire installation to the vehicle, with the main connection being last. connected. 6: Configure the interface software according to the instructions in the product description and in the manual. 7: Configure the retrofitted HU according to the user manual of the retrofit built-in device (steering wheel remote control/camera/hands-free kit/phantom power for the antenna and other parts). 8: Function test of the steering wheel remote control and the vehicle
Changes to the configuration of the HU interface and connection cable: 1: Change the configuration (de-energized) 2: Reconnect, see points 5 through 8 above. In the event of a malfunction of the interface or the vehicle: 1: Reinstall the OEM HU 2: Operate the OEM HU 3: Disable the CAN bus 4: Check the hardware configuration of the interface 5: Reconnection after disabling the CAN bus, see points 5 and 6 above.
Additional connections, changes to connections, alternative connections, connections of loose cables or extensions of loose cables that in the information text or the manual are listed, serve solely for guidance and are intended for the information of a trained specialized installer.
Additional connections, changes to the cable configuration of the wiring harness or the use of alternative connections or extensions: 1: Connections and modifications may only be carried out by a trained person. specialized installer. 2: Connections and modifications must be checked for any before connection. manufacturer's approvals or manufacturer's warranty conditions affected by the changes can be influenced. 3: Connections and modifications must be checked for operation and correctness before connection. checked by measuring them and comparing them with the cable allocation scheme of the vehicle. 4: Connections and modifications are carried out at your own responsibility, without guarantee on functionality. 5: Connections and modifications are carried out at your own responsibility, without any warranty regarding damage to the vehicle, the aftermarket device or the interface. 6: Modifications to the pre-assembled wiring harness may void the product warranty. invalidate Suitable for: Honda Civic 2001-2006 Honda CR-V 2004-2006 Honda S2000 1998-2004





 Free 30 days exchanges




 Secure payment